Development Workflow
Introduction#
If you have worked with Git in other CS classes, you might be familiar with pushing to master
directly. At Cornell DTI, pushing to master is prohibited and the policy is strictly enforced by
GitHub branch protection with no exception.
If you are not familiar with the pull request workflow, you should read the following steps and follow them for each of your task.
Concrete Steps#
Step 0: setup a local project#
See Setup your project in the Git tutorial.
Skip if you alreday have your repository setup.
Step 1: plan#
For every pull request, your "significant lines" usually should not exceed 1000.
Significant lines are defined by all your changes minus
- Lock files like
package-lock.json,yarn.lock,Podspec.lock, etc. - moved lines
To ensure you do not exceed the limit, you need to plan before you write any code.
- Think about what's the smallest non-negative change that leads one step closer to your final task.
- Non-negative means that your change can be merged into master without breaking anything.
- Smallest means removing unnecessary changes: e.g. do not fix two unrelated bugs in one pull request. Create two instead. Don't be too ambitious to do everything at once.
- You might find yourself in this situation.
- I need to do feature A.
- After some coding, I found that feature A depends on refactor B.
- After some refactoring, I found that refactor B depends on bug fix C.
- ...
- After all steps are done, diff is already 4000+ line long.
- Plan ahead so that you create a PR for bug fix C first, then refactor B, and finally feature A.
- Ask for reviews early and ask for reviews often.
- Avoid unnecessary changes
- Avoid rewriting other's code to match your style. If it is really problematic, create an issue and do that in a separate PR.
- Gate any WIP features
- Sometimes it's hard not to break master while features are being incrementally developed.
- e.g. Samwise's repeating task requires refactoring a lot of code. Each PR only refactors one part of the code
- Gate the incomplete feature behind a flag. For example, this new UI will not be shown unless certain environment variable/localStorage value is set to TRUE.
Step 2: sync with master branch#
You should keep your local repository to be up-to-date with latest master.
See Pull latest changes from remote in the Git tutorial.
Step 3: create a local branch#
Always start a new branch when you need to work on something new.
See Create a new branch in the Git tutorial.
Step 4: make your changes#
This is the coding part. You should write good code. Bad code will not pass code review.
Step 5: test your changes#
You should find ways to prove that your changes work. You will need to document this in your pull request comment later.
Step 6: checking your code quality#
Your repository should have linter or/and formatter already setup.
If your repository has formatter setup, run the formatter first to ensure your code matches the team's style.
Then you should run the linter to check for some stupid mistakes.
Finally, if you project uses a statically-typed language, run the compiler to find if there is any type errors. You should try to fix these errors instead of suppress them.
Step 7: push your changes to remote#
See Push to remote in the Git tutorial.
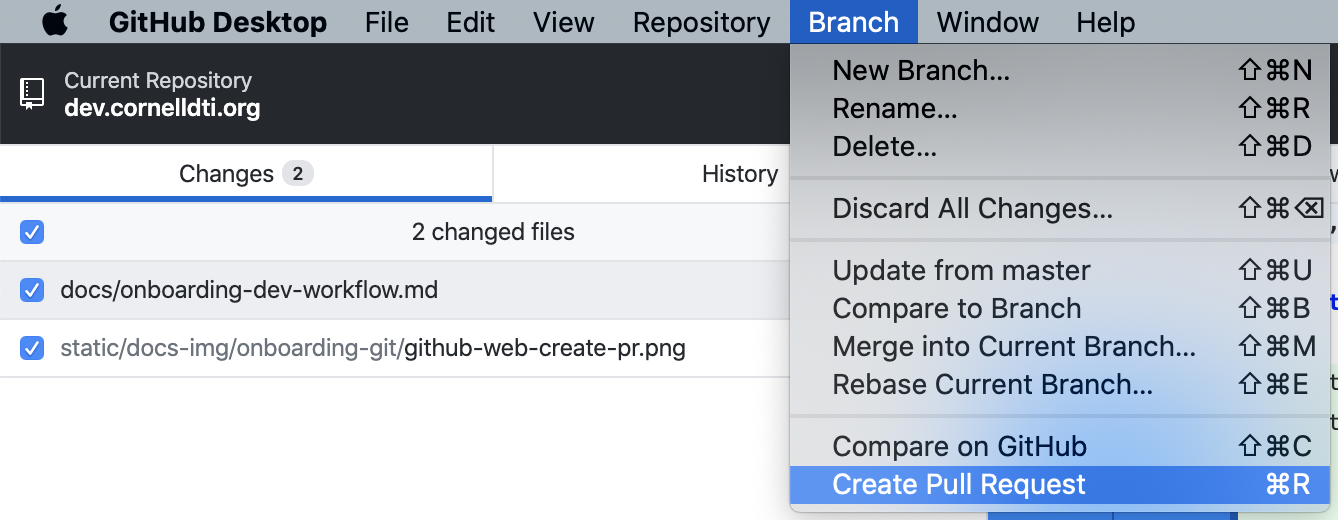
Step 8: create a pull request#
- GitHub Desktop
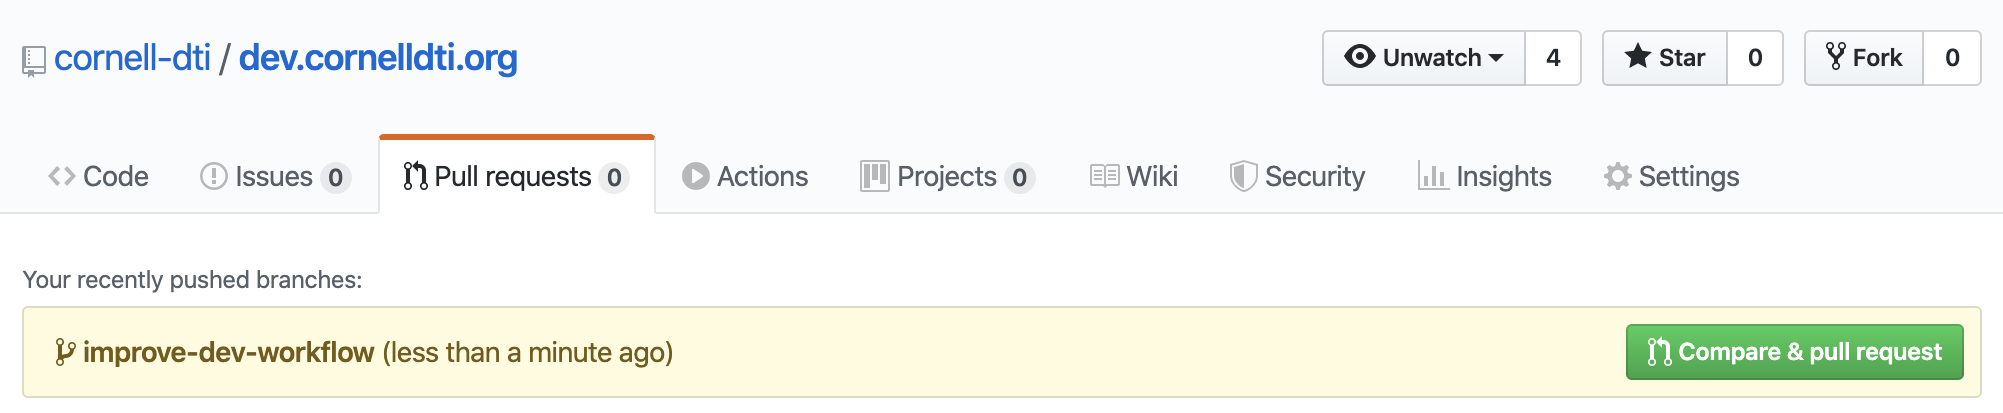
- GitHub Web
Command/Ctrl R in GitHub Desktop or click Branch -> Create Pull Request.
Go to the Pull requests tab. Click the green Compare & pull request button.
You should follow the pull request template in your repository. They will be automatically pre-filled when you are creating a pull request. You should fill in the required part.
You should at least write a summary of what you did in this pull request and the test plan.
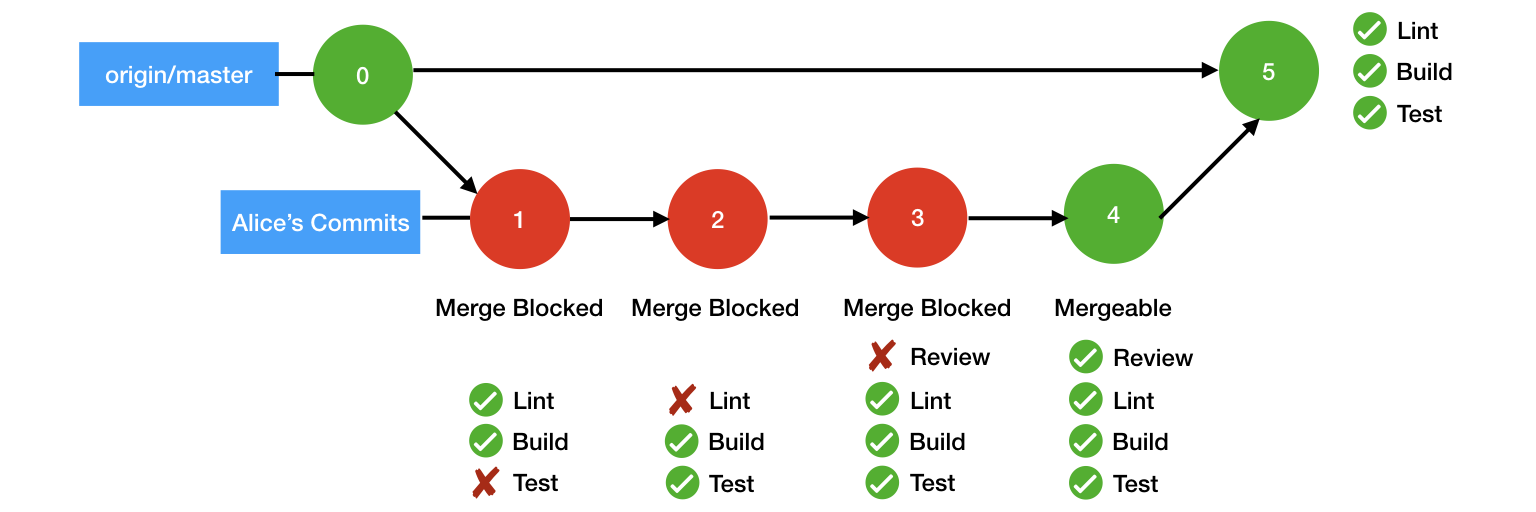
Step 9: waiting for review#
Ask your peers to review your code. They might request changes. You should make changes to address your concern, or defend your implementation approach and ask for their review again.
Some bots may also participate in the review process. For example, dti-github-bot will check if
your pull request is too big. You will also see some CI status in the bottom of the pull request
page. Your pull request must pass all required CI checks.
The progress can be illustrated by the graph below:
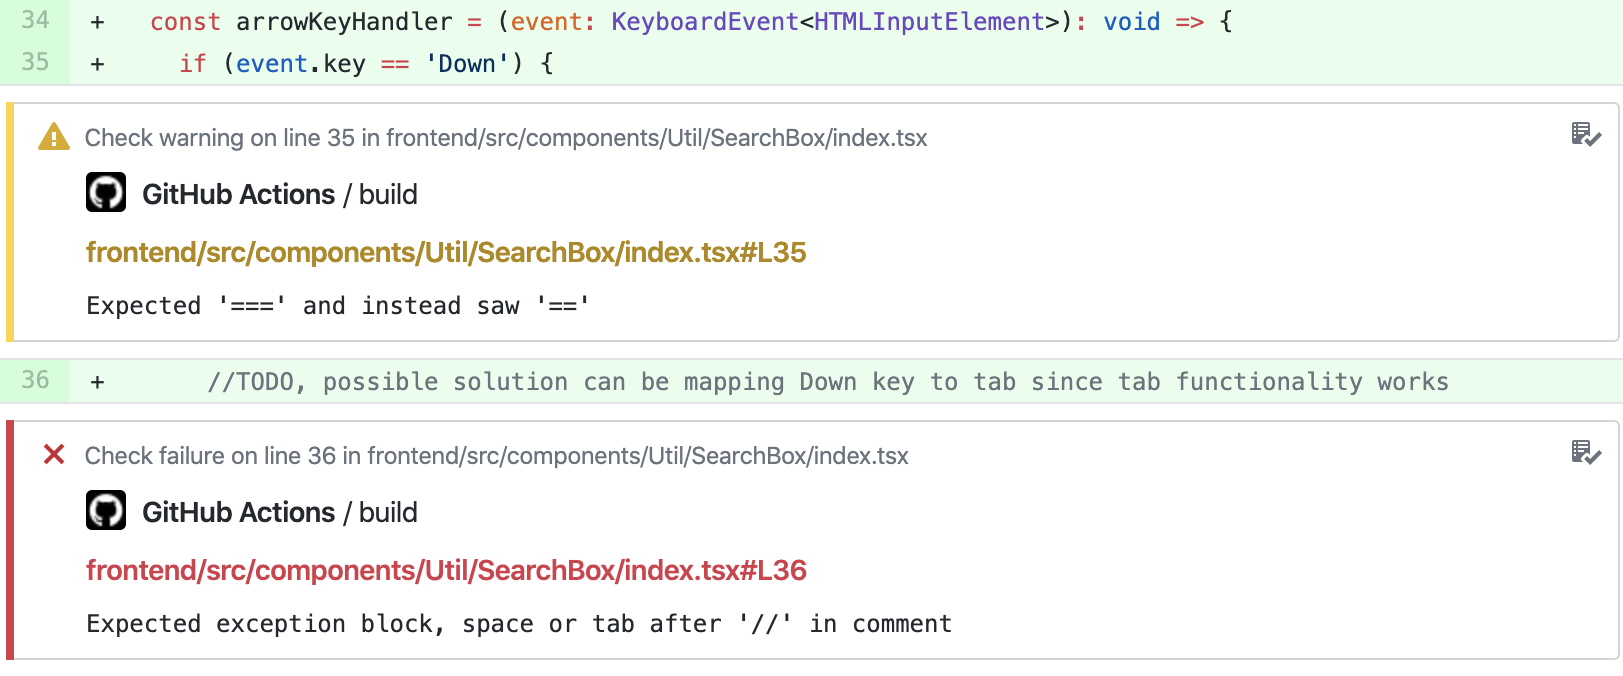
Here are some example of bots participating in review:

Step 10: merge into master#
🎉 Your changes are merged. The continuous deployment scripts will automatically deploy your changes to staging.
You should delete your local branch immediately, and start your new work on a new branch.